Each SSO Identity Provider requires specific information to create and configure a new Connection. Often, the information required to create a Connection will differ by Identity Provider.
To create an Okta SAML Connection, we’ll need to use four pieces of information:
- ACS URL - provided by Verbate
- The ACS URL is the location an Identity Provider redirects its authentication response to. In Okta’s platform, they call this the Single Sign On URL in the setup (not to be confused with the Identity Provider Single Sign On URL below!)
- SP Entity ID - provided by Verbate
- The SP Entity ID is a URI used to identify the issuer of a SAML request, response, or assertion. In this case, the entity ID is used to communicate that Verbate’s SSO provider, Auth0, will be the party performing SAML requests to the Enterprise's Okta instance.
- Identity Provider Single Sign-On URL - provided by you
- This will be found within the “View SAML setup instructions” window within the setup wizard
- Signing Certificate - provided by you
- This will also be found within the “View SAML setup instructions” window within the setup wizard
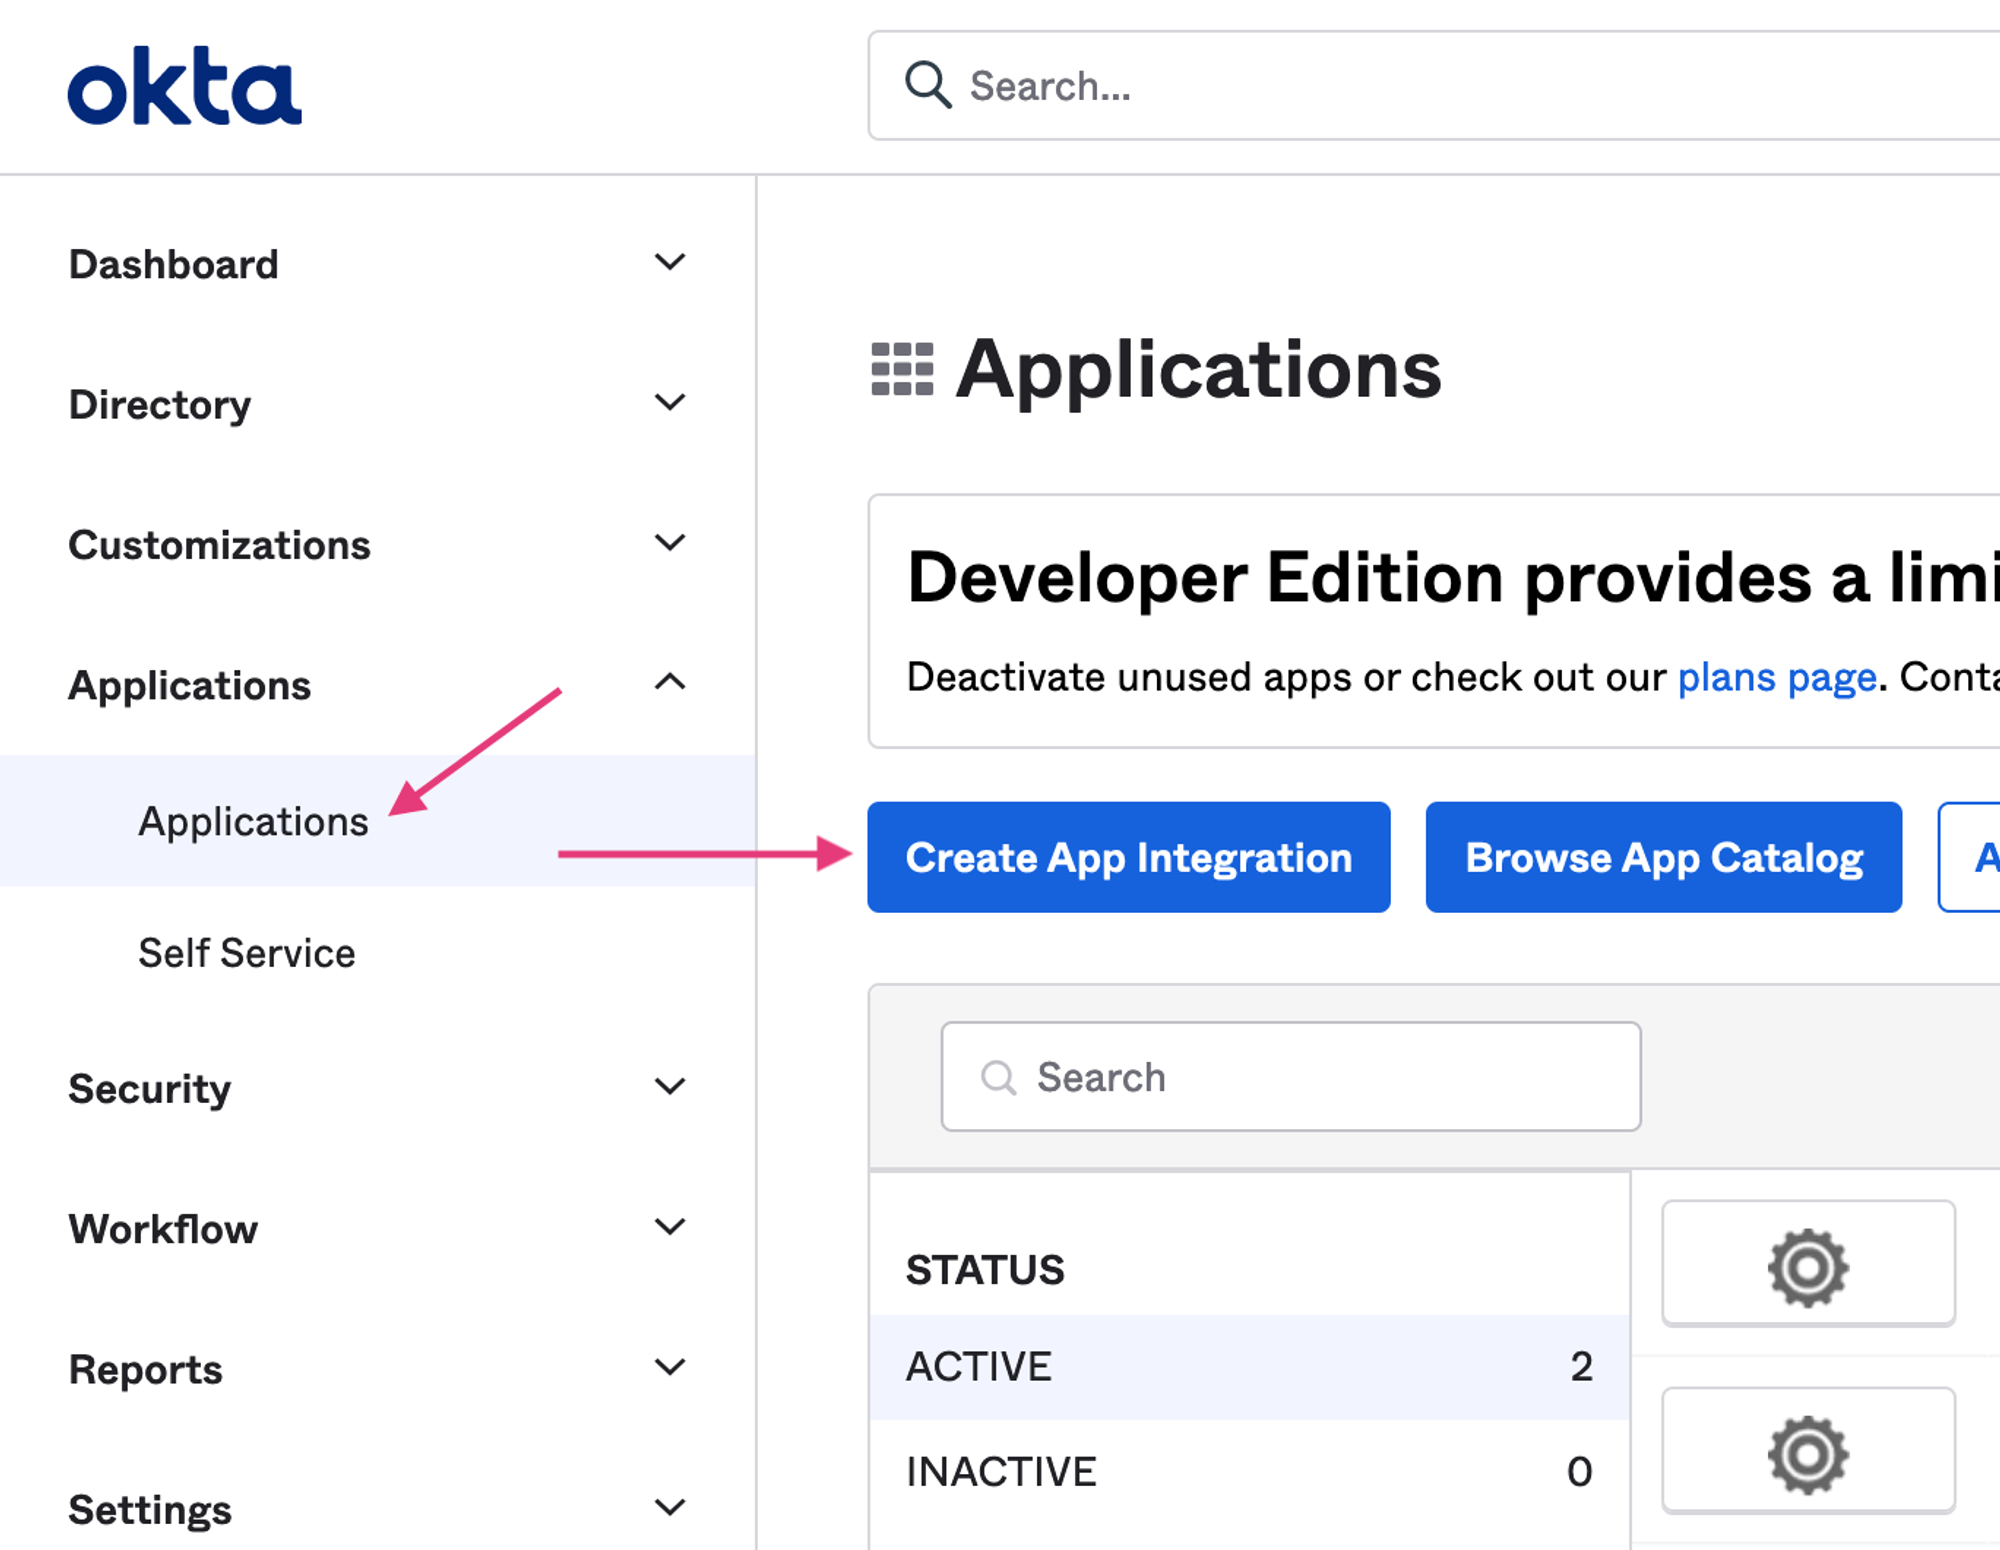
Step 1: Log in to Okta
Log in to Okta, go to the admin dashboard, and select "Applications" in the navigation bar.
Select "Create App Integration".
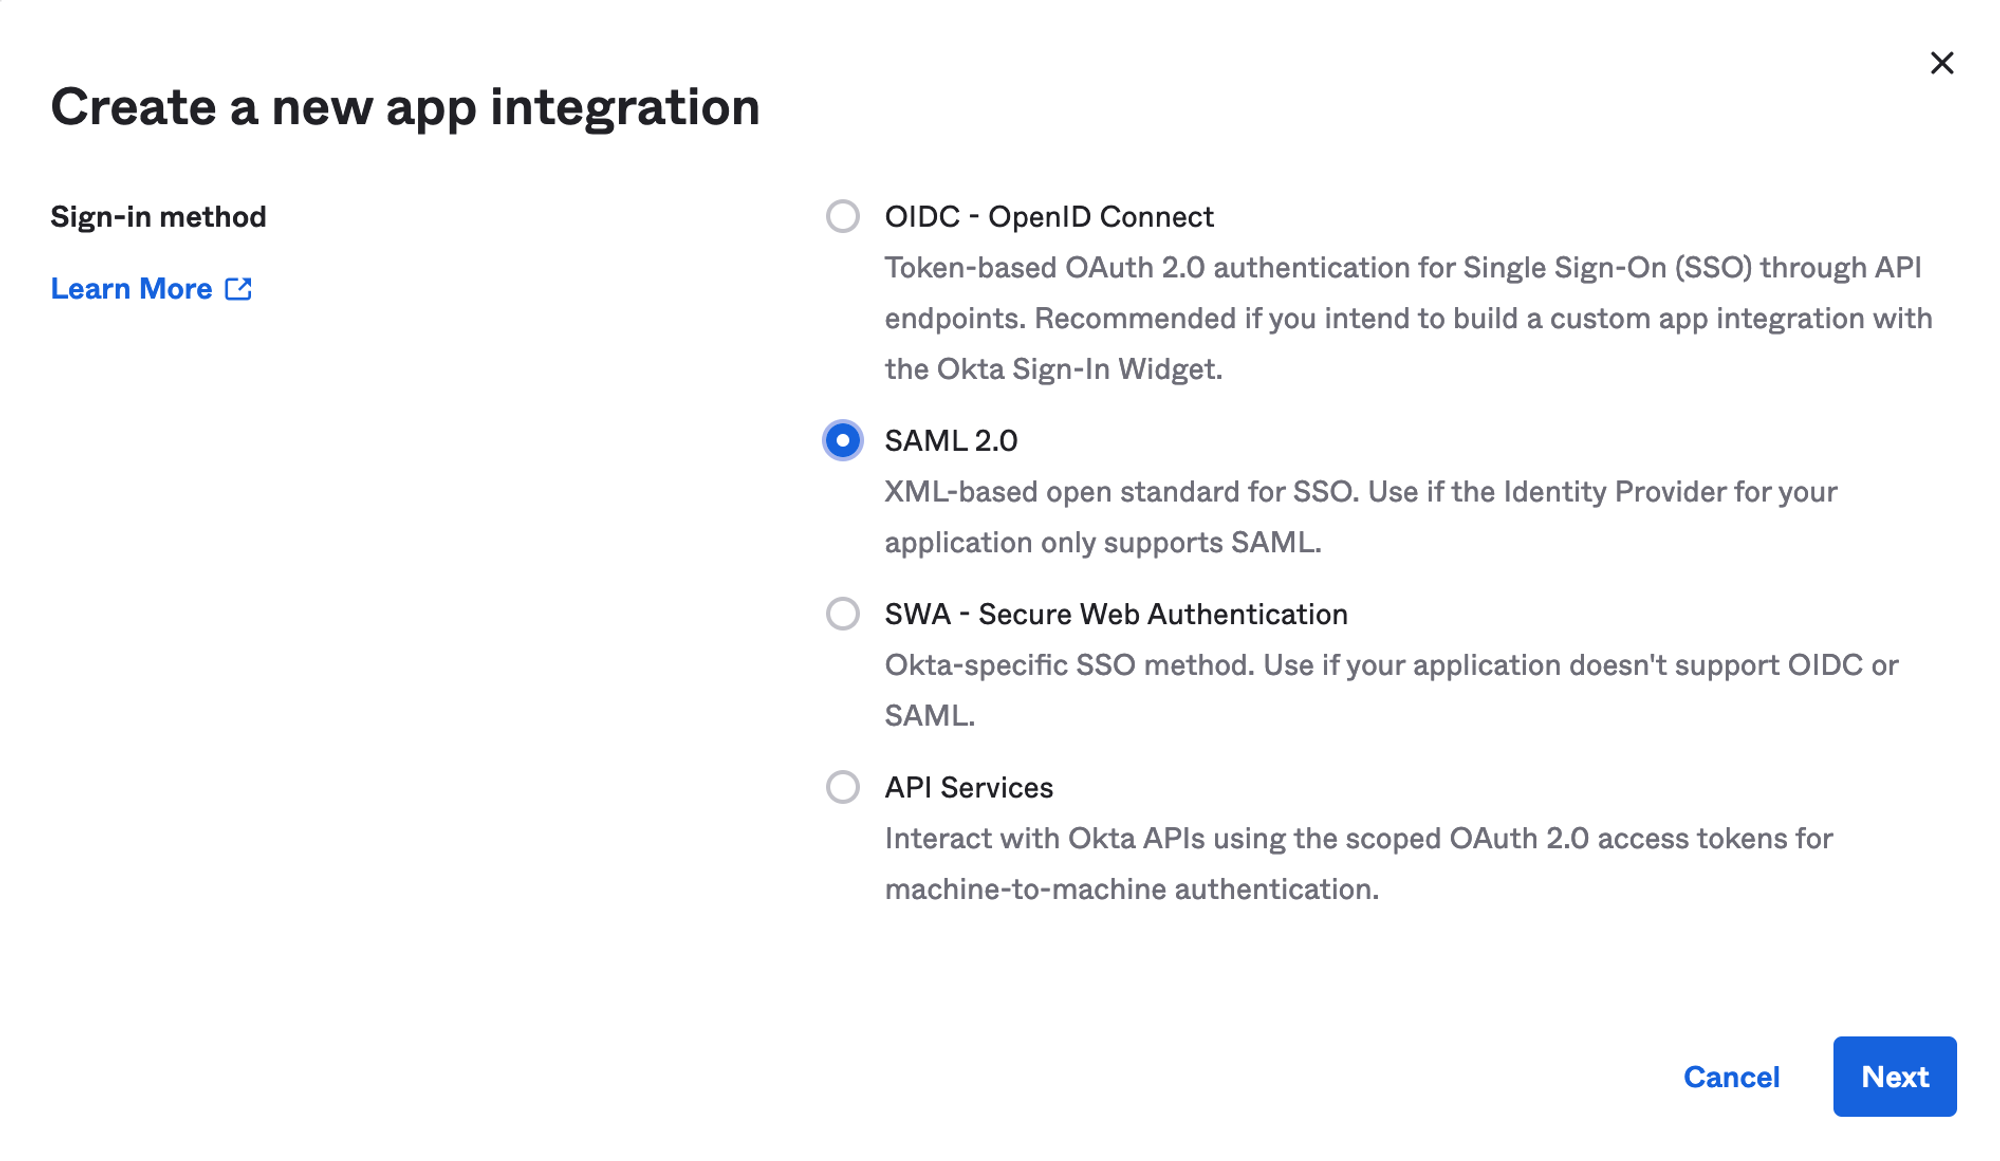
Step 2: Initial SAML Application Setup
Select "Create New App", then select "SAML 2.0" as a Sign on method, then click "Next".
Enter a your preferred App name (eg. “Verbate ERG Platform”), upload an app logo, then click "Next".

Verbate App Logo:
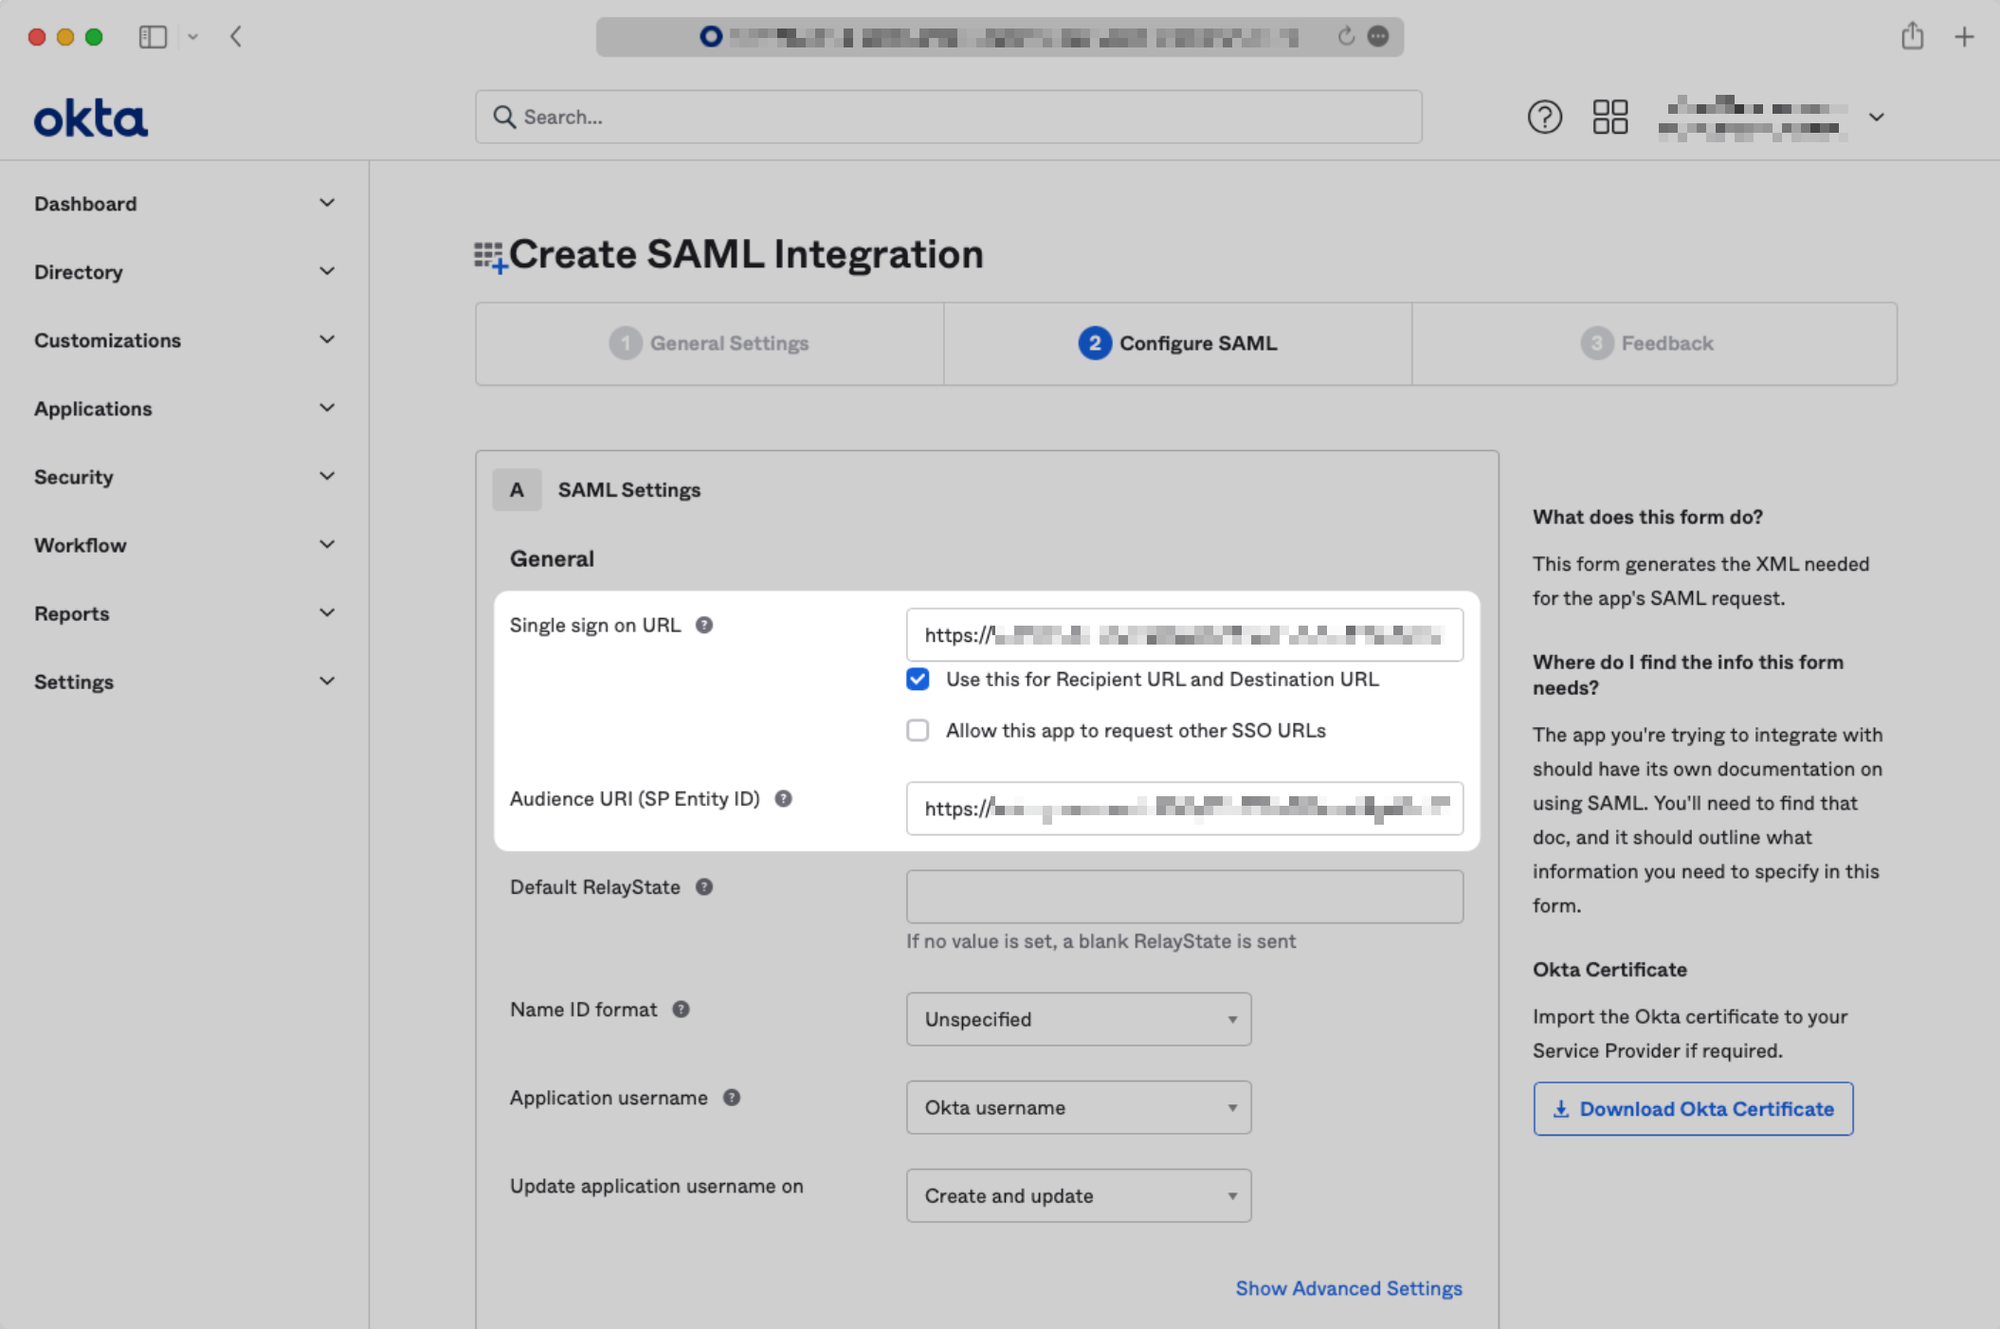
Step 3: Configure SAML Application
This is where you use the links Verbate provided to get set up!
Input the ACS URL that Verbate provided to you as the "Single sign on URL," and input the SP Entity ID that Verbate provided you as the "Audience URI (SP Entity ID)".

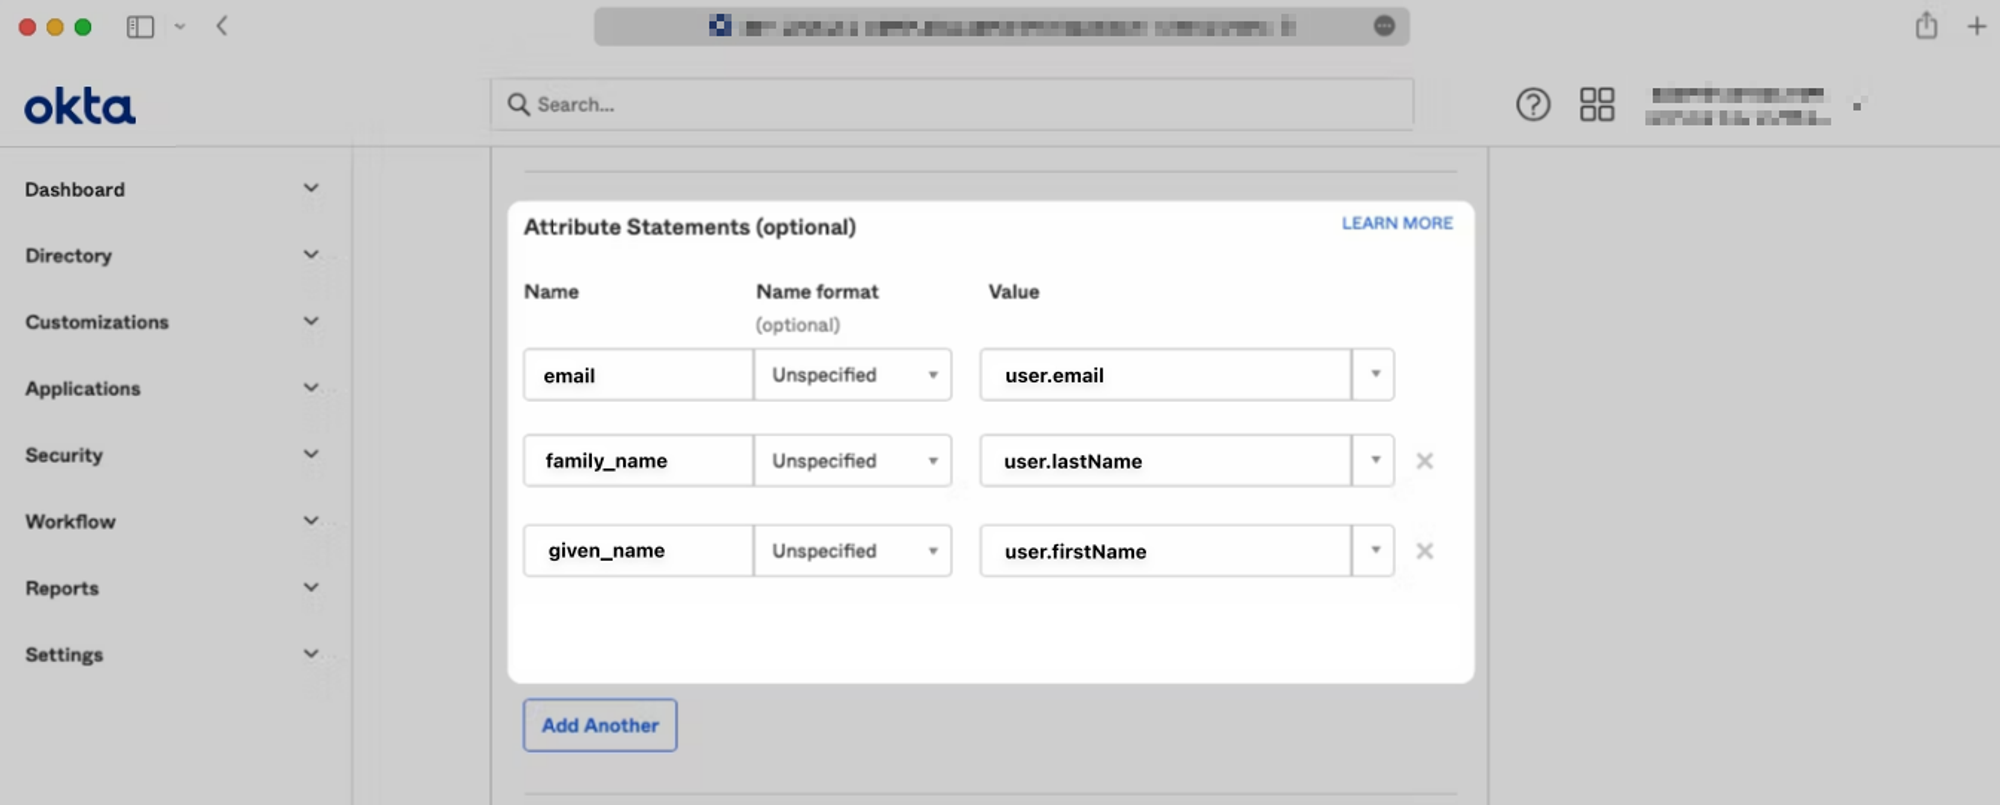
Scroll down to the “Attribute Statements” section and use the “Add Another” button to add the following key-value pairs. Then, click “Next”.
email → user.email
family_name → user.firstName
given_name → user.lastName
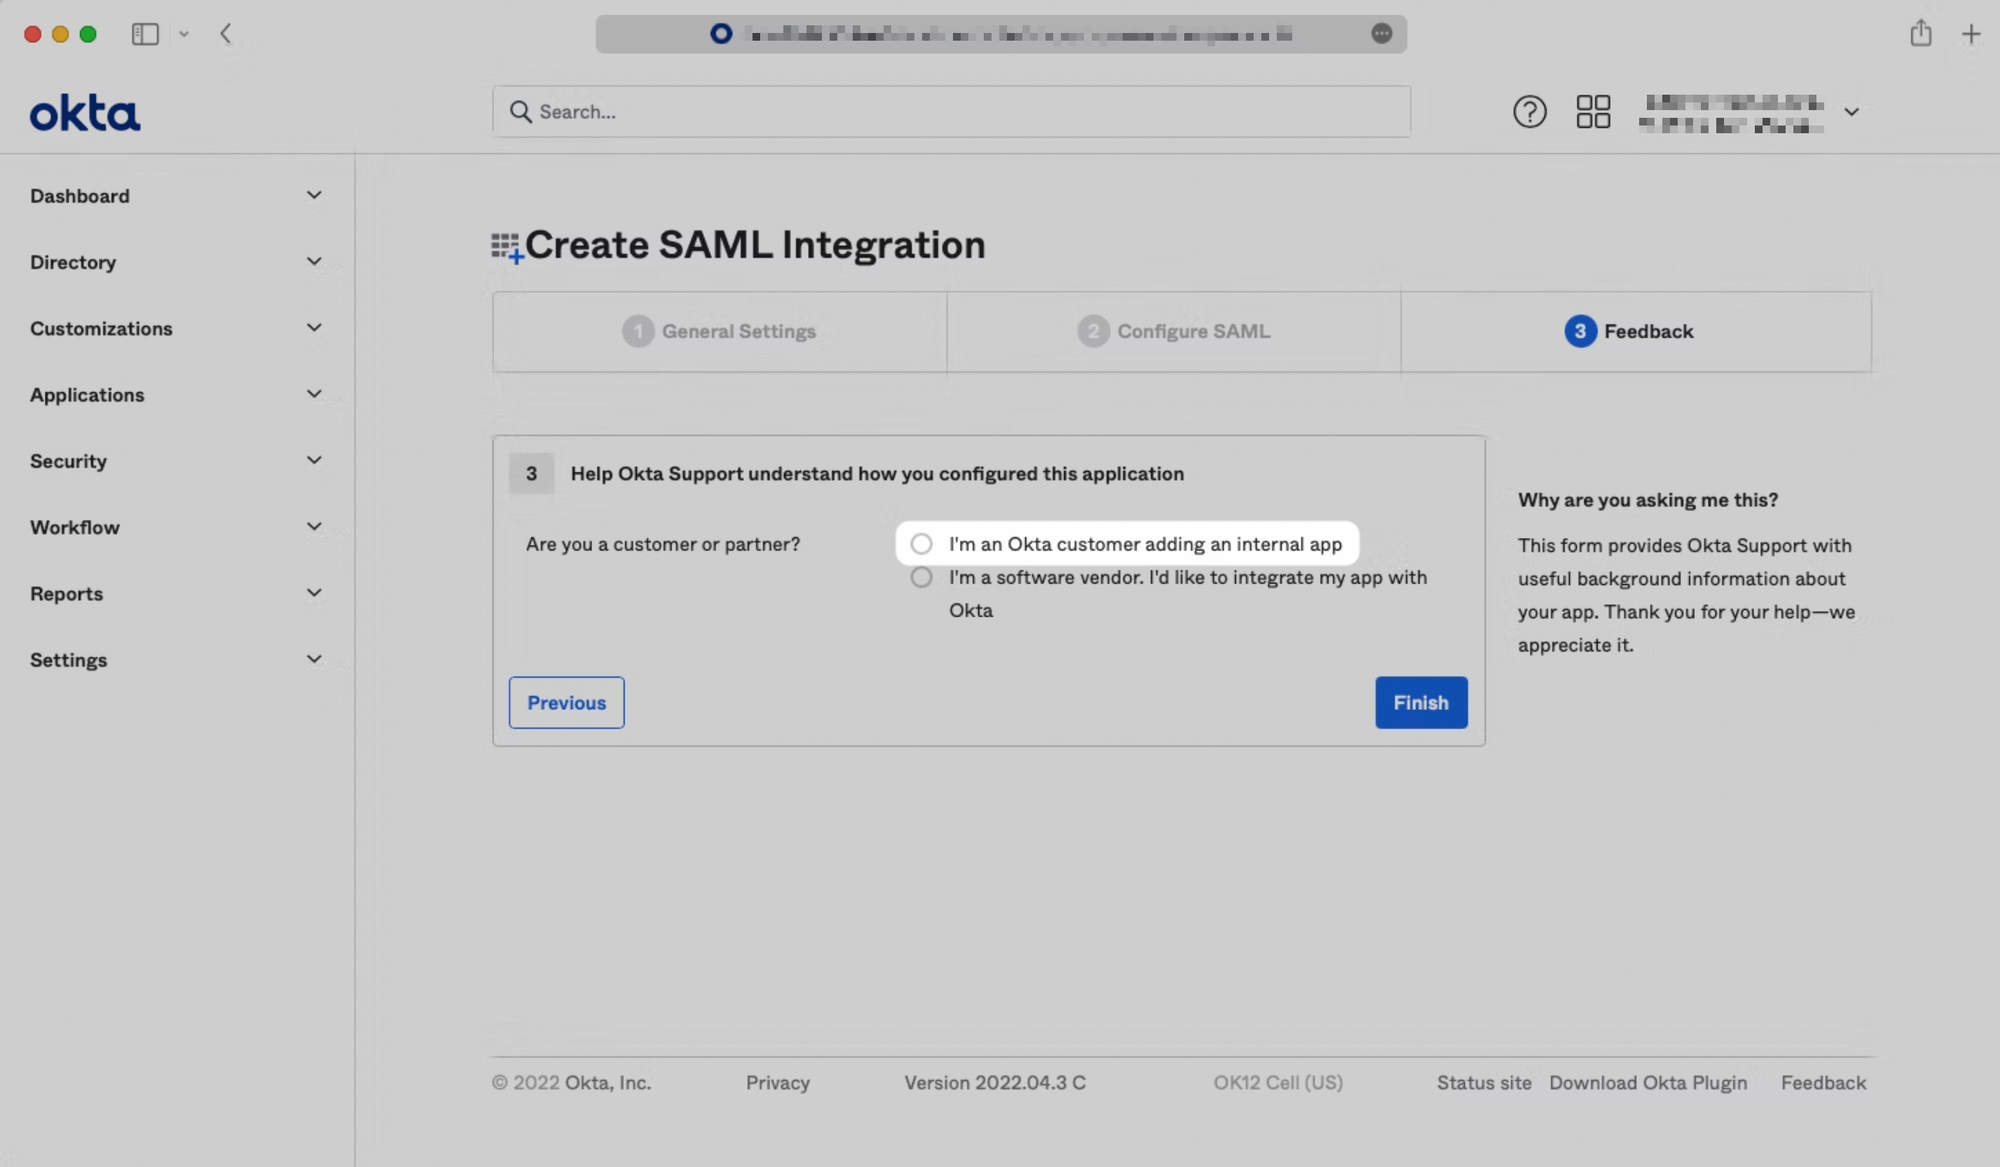
Step 4: Submit Application Feedback
Select "I'm an Okta customer adding an internal app.”
Step 5: Retrieve Identity Provider SSO URL & Signing Certificate
You will now need to provide Verbate with the following information the View Setup Instructions button in the application's Sign On tab:
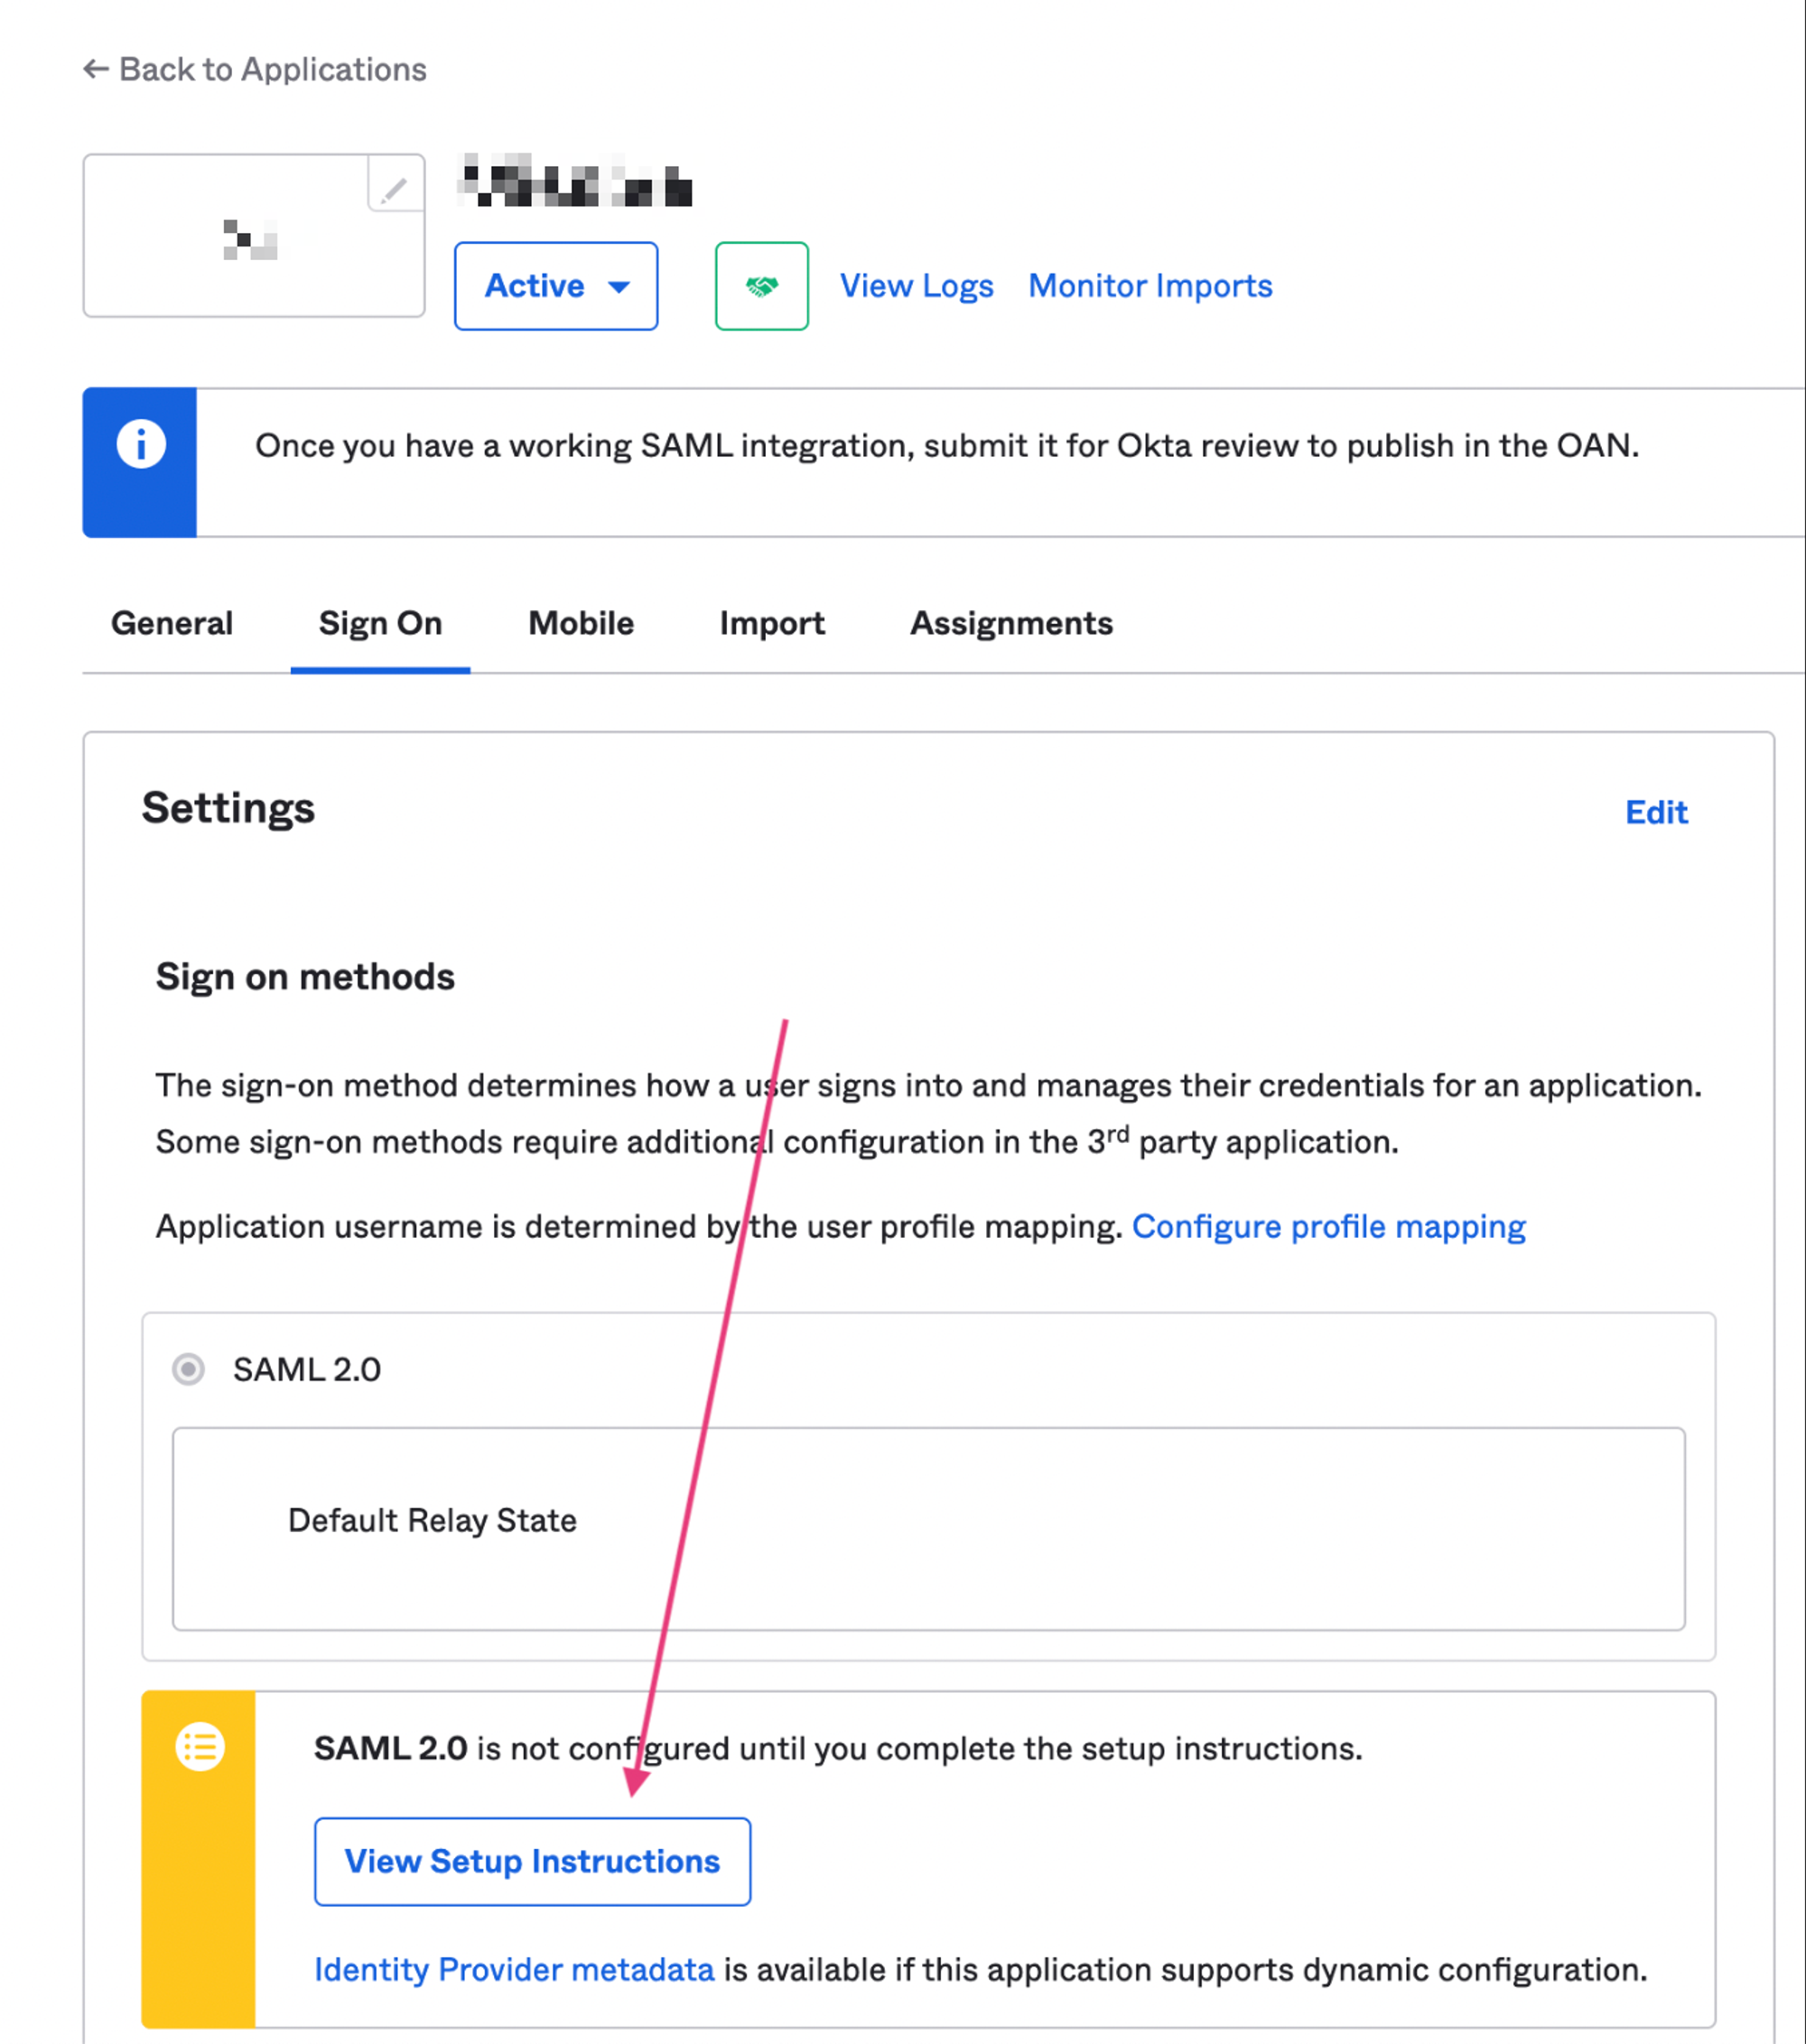
Not seeing the View Setup Instructions button? You might be in the Developer Console mode. Switch your mode to “Classic UI” in the upper right hand corner of the page.
There are two elements from the below page you’ll need to share with Verbate:
- Copy the Identity Provider Single Sign-On URL
- Download and share the X.509 Certificate

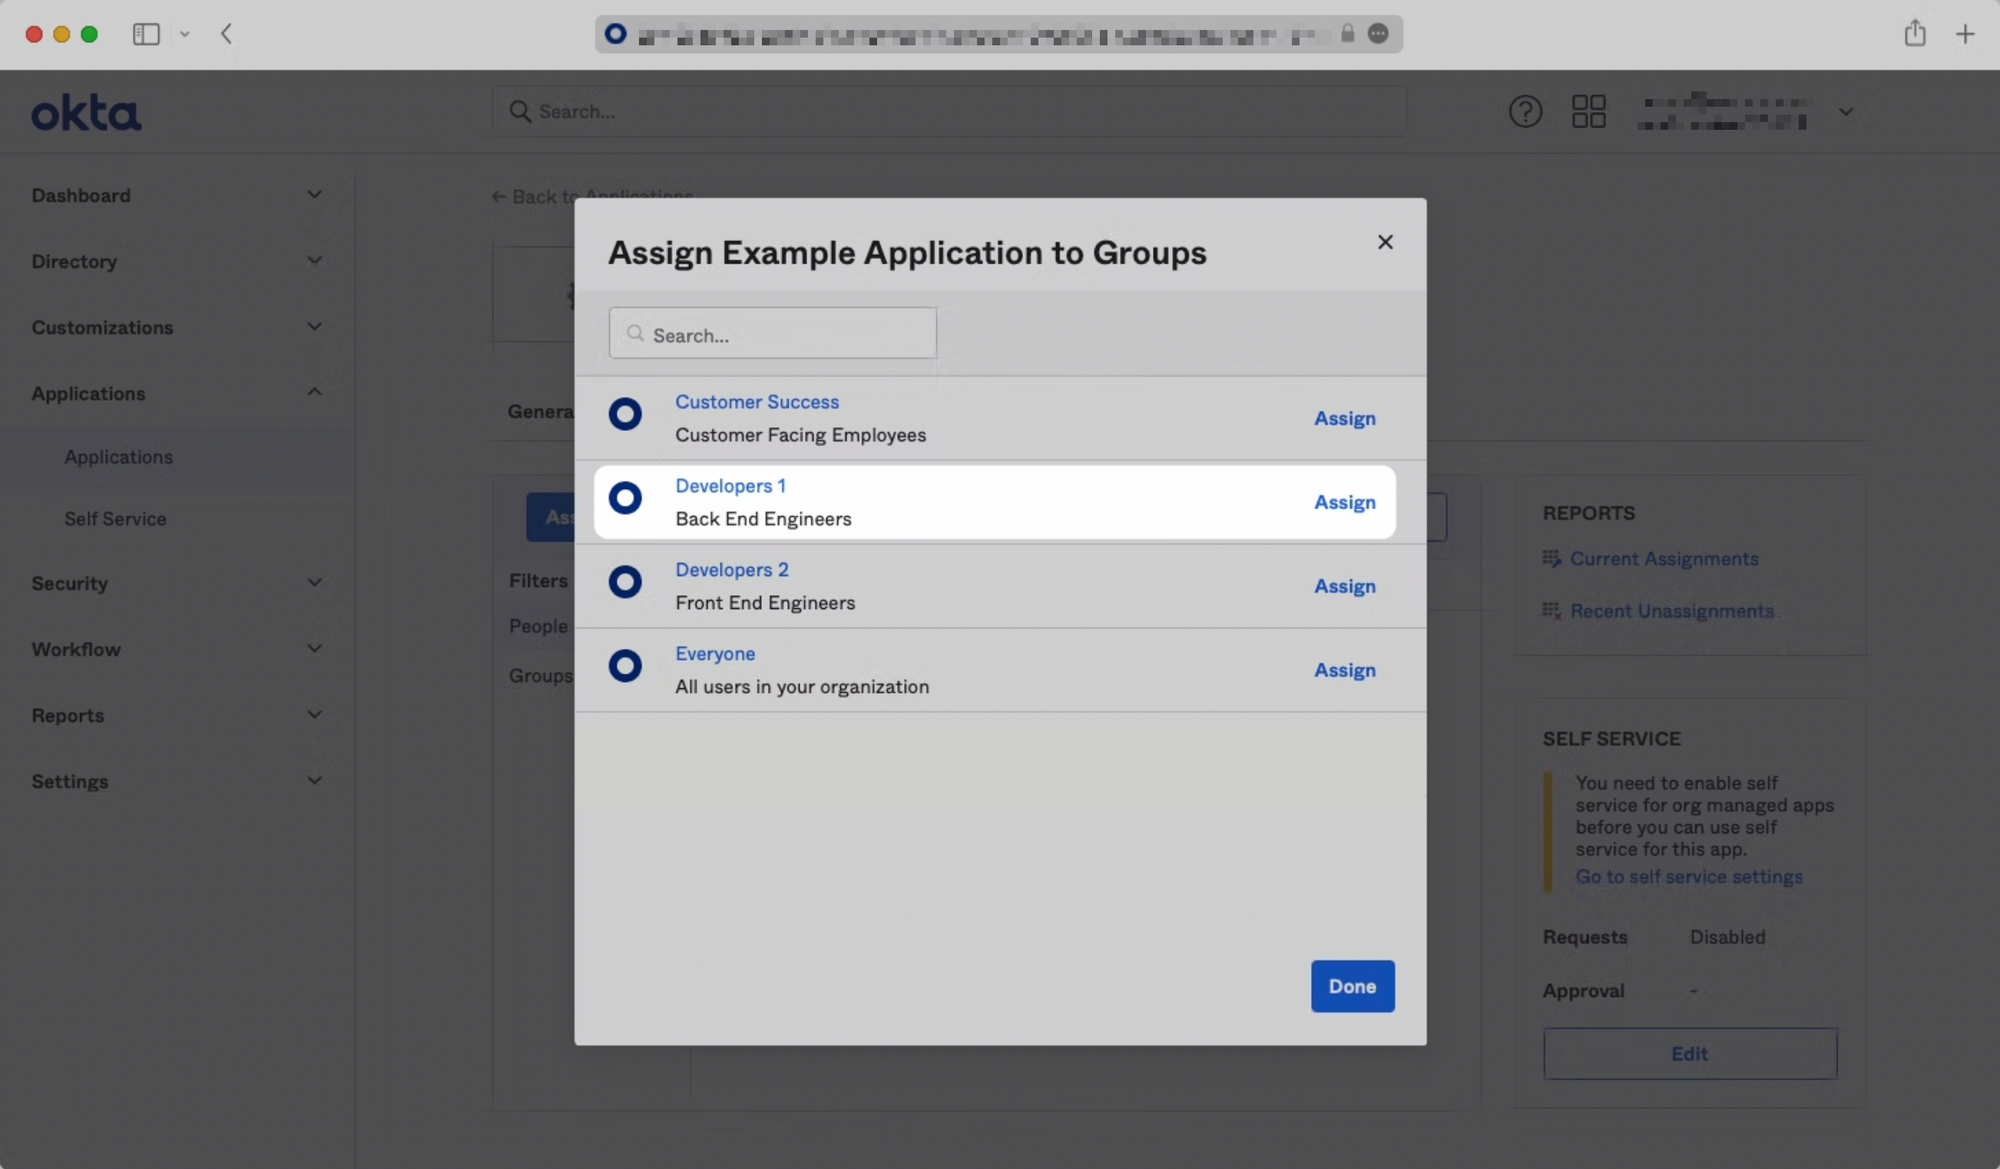
Step 6 (optional): Add Users to SAML Application
If you’d like to give specific users permission to authenticate via this SAML app, you will need to assign individual users and/or groups of users to the Okta SAML app.
Click on the "Assignments" tab, and select either "Assign to People" or "Assign to Groups".
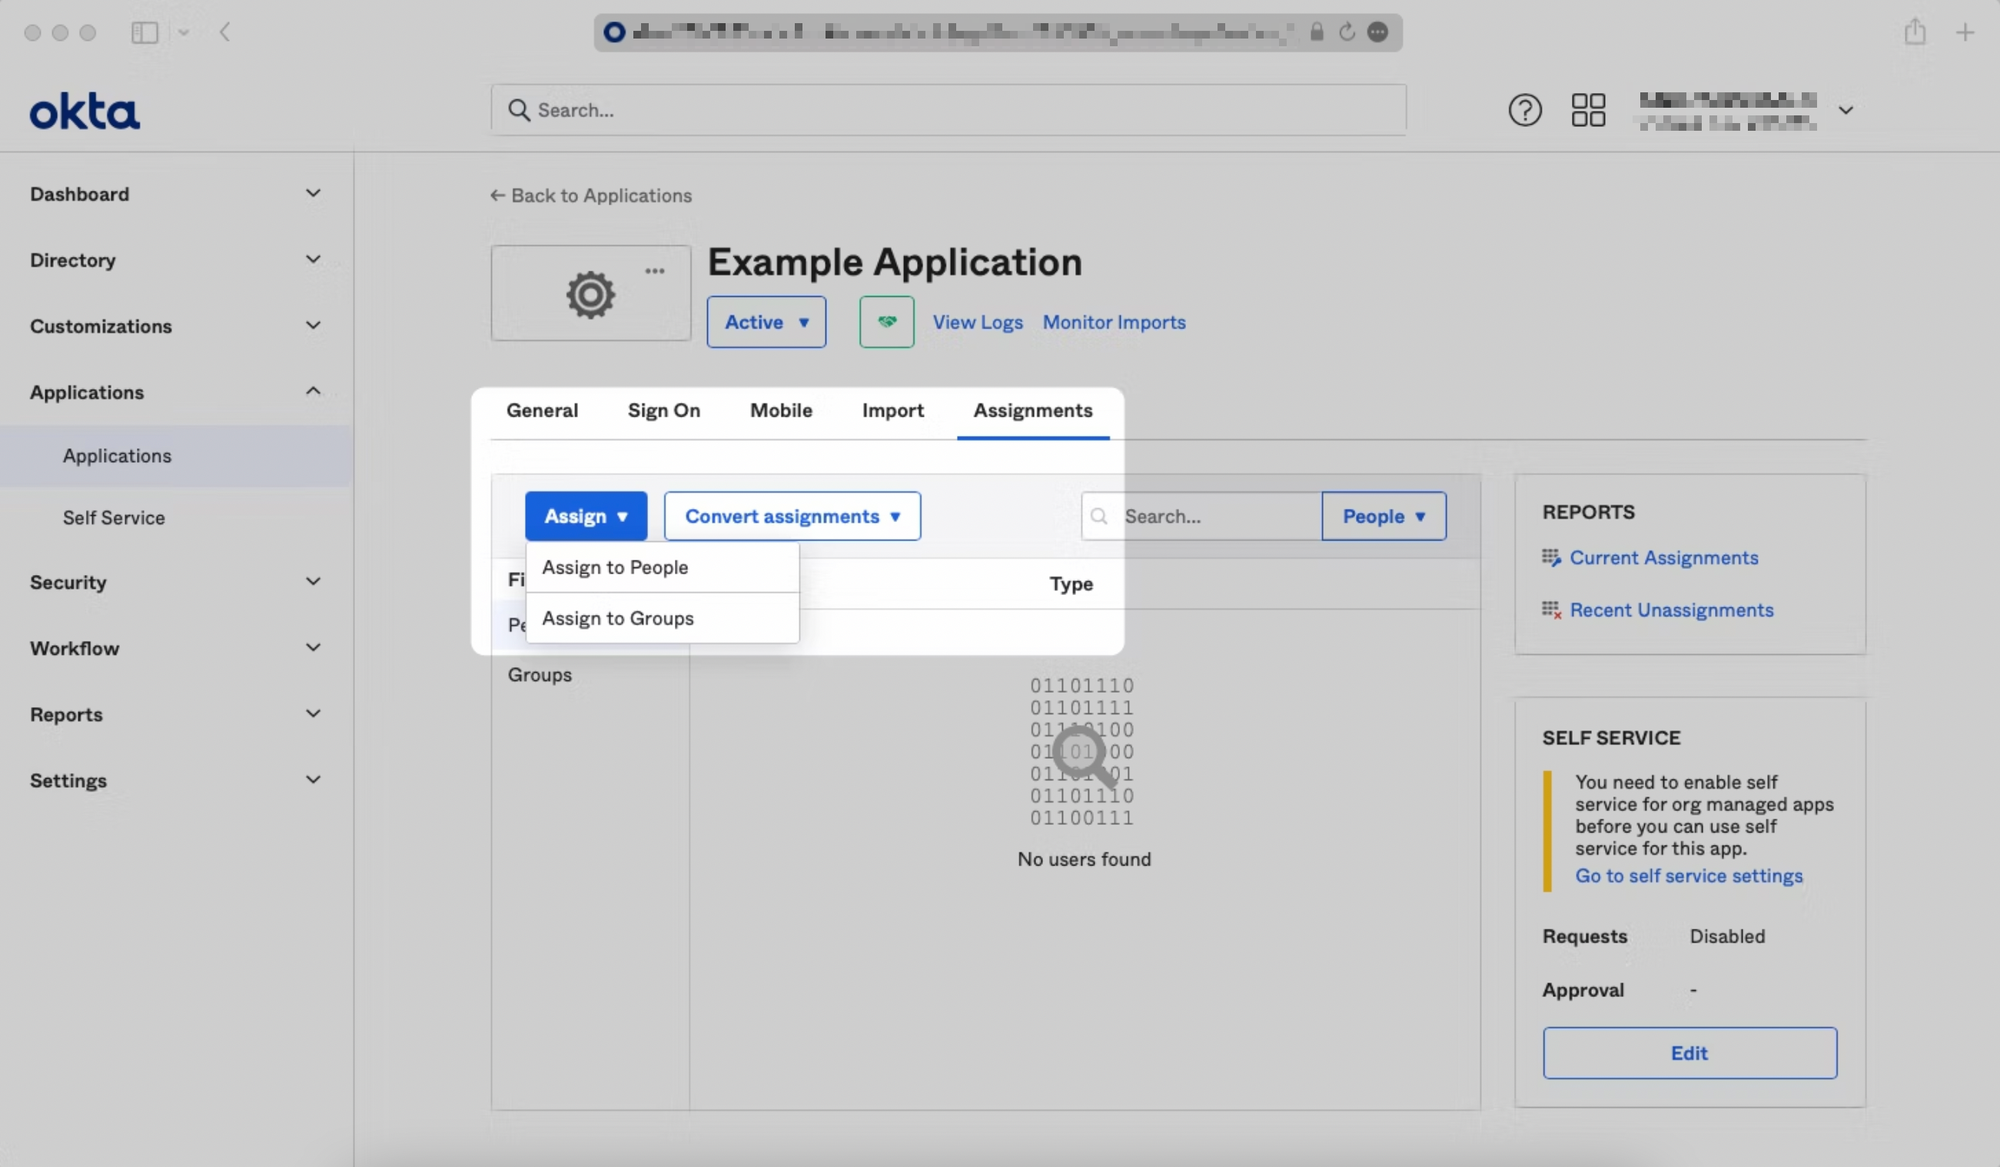
Find the individual user(s) and/or group(s) that you would like to assign to the app, and click "Assign" next to them. Click "Done" when you are finished.